Wednesday, December 18, 2024
Home Blog Page 5

What is Thrifting Shopping?

0

What exactly is thrift shopping? This query appears simple, especially considering our frequent discussions on saving. Here, we offer valuable insights and guidance on ethical thrifting and sustainable fashion. Exploring thrift stores might be perplexing due to their diverse types.

People hold varying opinions about shopping at thrift stores. Some enjoy the hands-on experience of sifting through a multitude of clothes, while others prefer the organized setting of conventional retail outlets.

How does the thrift store experience differ from that of a typical retail store? What types of items can one discover in various thrift stores? Simultaneously, what exactly does “thrifting shopping” entail? Here, we will elucidate these aspects in straightforward terms.

You might have heard someone mention they’re going thrifting as individuals seek fresh avenues for expressing their creativity. Thrifting, in simple terms, involves shopping for secondhand items at stores offering discounted prices. Secondhand treasures can often be unearthed by exploring thrift stores, perusing flea markets, or attending garage sales. In contemporary times, online thrift stores are also gaining popularity.

What Is Thrift Shopping?

So, what is thrift shopping?? and What does the term “go thrifting” refer to exactly? Thrifting is the act of purchasing clothing, furniture, footwear, accessories, or other items that are already used or secondhand.

For decades, people have gone thrifting, which means shopping for pre-owned items like clothes, glassware, or furniture at lower prices. You can find thrift items at dedicated stores, garage sales, or flea markets. Thrifting enables people, including families, to buy affordable high-quality items. Thrifted items are pre-owned and have been enjoyed before, but they’re usually still in good condition and have lots of useful life remaining for a new owner.

To clarify, Thrifting refers to the practice of purchasing pre-owned items (thrift items) from secondhand stores. Rather than shopping at traditional retail stores, many people prefer to visit local secondhand shops to discover unique finds.

The secondhand market in the U.S. is expected to grow rapidly. ThreadUp predicts that thrifting shopping will double by 2026, with a total value of $82 billion.

At thrift stores, you can find items that are both very old and brand new, with some new items even still having their original tags. The uniqueness of thrifting lies in the fact that you do not have a specific item in mind to buy. This is because you never know what you might stumble upon while searching. Part of the appeal of thrifting is the experience itself, which can feel like searching for treasure.

Many people are turning to thrifting as a sustainable fashion option. By reusing and repurposing items, thrifting helps reduce the environmental impact of the fashion industry. Although people have different reasons for going thrifting and looking for different things, it has become a popular alternative to fast fashion.

What Are Thrift Stores?

Stores that are doing business in selling secondhand goods, whether a physical store or online marketplaces. Thrift stores can vary in size from small local sales or flea markets to larger chain stores that operate nationwide.

what-are-thrift-stores

You can find many people at a thrift store. They range from those who are looking for something specific to those browsing through items in search of a unique find. You can also find people who are looking for vintage clothing and antique items, as well as people just looking for a bargain.

Online thrift stores offer a variety of sizes, styles, and prices for you to choose from. While shopping from your eco-friendly couch is convenient, remember that you won’t be able to see or try on the items beforehand.

What Distinguishes a Thrift Store from Other Stores?

The thrift store offers second-hand items such as clothing, furniture, and household items. Prices at thrift shops are cheaper than regular retail price. Most thrift shops accept donations of old items from the community to assist those in need and save money.

what-is-the-difference-between-a-thrift-store-and-a-regular-retail-store

At thrift stores, you can donate your gently used items and receive a store credit or discount. The store’s employees or volunteers will select which items will be sold. Thrift stores like Goodwill or the Salvation Army often have a social mission, and the profits from your donation may support a local charity or other cause.

Shopping at a thrift store is a unique experience compared to shopping at a retail store. Thrifting is different from retail shopping because you don’t need to have a set shopping list. The excitement of discovering one-of-a-kind vintage items and off-season pieces is what makes thrifting fun at your local thrift store. You have the freedom to buy whatever items catch your eye and appeal to you. Moreover, upon reaching the billing counter, you will notice a considerable reduction in the total cost compared to purchasing the same items at a standard regular retail store.

Most thrift stores do not accept returns or offer refunds, whereas retail stores typically allow returns and exchanges.

Retail stores mainly aim to make a profit by obtaining their products from manufacturers or wholesalers, despite the fact that some may also support charities or have other causes.

Finding Treasures at Local Thrift Stores

Visiting a thrift store can be a fun way to find unique clothing and household items. These stores regularly update their inventory, meaning you’re more likely to come across items that are truly one-of-a-kind and can’t be found elsewhere.

local-thrift-stores

Shopping at a thrift store is different from shopping at regular retail stores because you never know what you’ll find. Since thrift stores sell donated items, you may come across various sizes, colors, and styles that may not be popular or in season at the moment. It is not recommended to have a particular item in mind when visiting a thrift store.

Sometimes, in addition to their regular physical store sales, people also have a garage sale. These sales offer a variety of items for visitors to buy, including second-hand clothing, accessories, furniture, and household items, among other things which are less than the full price from a regular store.

What is The Meaning of Thrifter?

The term “thrift” originally denoted wealth but now refers to the practice of being frugal. Being thrifty can lead to financial success, as it involves saving money. Thrift stores offer affordable clothing options to save more money.

what-is-the-meaning-of-thrifter

A thrifter is someone who purchases or sells used items. Some thrifters do it for financial reasons like Lower-income communities purchasing designer brands from second-hand stores., while others, choose to thrift as a way to promote an eco-friendlier fashion industry.

Many people are motivated to shop at thrift stores by the excitement of searching for unique finds. A significant number of thrift store shoppers are creative people who can envision fresh purposes for used items.

Thrift stores have so much to offer that shopper can easily get lost among the corridor of old books, vintage designer clothing, and discontinued board games. You can find rare collectibles, valuable jewelry, and unique items that are not available elsewhere from them, making them an excellent source.

Types of Thrifters

The market of thrifting is ever-growing, and there are various types of thrifters. Some of the common ones include:
1. Bargain Hunters – These thrifters look for items at incredible prices with the intention to resell them for a profit.
2. DIYers – Thrifters looking for pieces to fix up and resell at a higher value.
3. Professionals – People that shop for thrift items to use in the workplace. This includes those who regularly shop for unique clothing, furniture, or art pieces to decorate their offices with.
4. Collectors – Thrifters looking for vintage items they can add to their collection.
5. Upcyclers – People who repurpose thrift items for a more sustainable lifestyle.
6. Trendsetters – Thrifters looking for fashionable apparel and accessories that stand out from the crowd.
7. Bargain Buyers – Thrifters looking for the lowest prices possible on everyday items.

Online Marketplace for Thrifting

online-marketplace-for-thrifting.jpeg

The trend of thrift shopping is changing with the rise of social media. While some still prefer traditional in-person thrifting, more people are now turning to online thrift shopping. A simple Instagram search can show you the latest thrift items found by the community. There is a trend on TikTok that encourages people to go thrifting in search of vintage collections or buy clothes challenges with the hashtags thrifting game.

Some Of The Famous Online Thrifting Stores are:

Online Thrift Stores USA

Online Thrift Stores for the UK

Online Thrift Stores for Canada

Different Types of Thrift Stores

types-of-thrift-stores

Online Thrift Shops For Secondhand Goods

Online thrift stores have become increasingly popular with the COVID-19 pandemic, and there are many options to choose from such as Facebook Marketplace, Depop, and Thread. While this form of thrifting is relatively new, it is growing rapidly.

Brick and Mortar Thrift for Second Hand Shopping

There are two types of in-person thrift stores: chain stores (such as Goodwill or Savers), and smaller independent local thrift stores. Each chain store location may have a different selection of items, while local thrift store typically has only one location and may not be as well-known. If you decide to visit an independent store for happy hunting or fun finds, it may take several visits to find something you love because these stores are smaller.

Consignment Shops

Consignment shops are similar to thrift stores, but the items sold in these stores have previously been owned. The prices of items in consignment shops tend to be higher than in thrift stores because the store typically charges a commission on each sale. It is important to note that consignment shop owners usually inspect and verify the condition of items prior to selling them in the store. This is why many consignment shops are considered to be more upscale than thrift stores.

Flea Markets

Flea markets are outdoor markets where vendors sell a range of items such as antiques, vintage finds, crafts, clothing, and jewelry. Unlike thrift stores, flea markets offer more diverse merchandise. These markets are perfect for finding unique and valuable items, as well as second-hand goods sold at discounted prices.

Garage Sales

To clarify, a garage sale is a casual sale of secondhand items that takes place at someone’s home or in their neighborhood. The items sold are generally less expensive than those found in stores and may offer unique or rare finds. Nevertheless, the variety of items for sale is typically smaller than that of thrift stores or flea markets.

Specialty Stores

Specialty thrift stores are exactly what they sound like; a thrift store that specializes in one specific kind of item like second-hand clothing, sneakers, or household items (furniture).

What Types of Things Can You Shop for In a Thrift Shop?

what-kinds-of-things-can-you-shop-for-in-a-thrift-shop

You can find gently used and vintage items at thrift shops, including clothing, furniture, housewares, books, electronics, and toys. Some thrift stores even specialize in certain items like vintage clothing or sneakers. It’s worth noting that prices at thrift stores are usually lower than at regular retail stores, so you can potentially find some great deals.

Thrift shopping has become increasingly popular in recent years and with the growth of online platforms, people enjoy finding amazing deals on second-hand items. Whether you are looking for clothing, furniture, other house items, or something unique and one-of-a-kind, thrift stores offer a wide selection of items at great prices.

Why Should I Go Thrift Shopping?

why-should-i-go-thrift-shopping

Shopping at thrift stores is an enjoyable way to discover one-of-a-kind items and also contribute to the community. Thrift stores provide employment and help local communities in need. They also offer a wide range of items at discounted prices, which can save you money. Additionally, thrift shopping is an eco-friendly way to shop because it helps reduce waste by reusing and repurposing second-hand items.

Eco-Friendly Benefits of Thrift Shopping

eco-friendly-benefits-of-thrift-shopping

It is likely that you have shopped at a “Fast-Fashion” store, which produces trendy clothing while taking advantage of garment workers. Unfortunately, the popularity of fast fashion has led to a global environmental issue, with the average American throwing away approximately 81 pounds of clothing every year. Even worse, many of these discarded clothes end up in landfills, causing further harm to the planet.

A recent study found that when we dispose of clothes, 70% of them are sent to landfills and 30% are burned. Clothing made by fast-fashion companies is typically made of materials that can harm washing machines, unlike older clothing which is more organic and long-lasting. The study also revealed that washing fast-fashion clothes produces approximately 9 million synthetic microfibers per load, which can pollute our waterways.

Microfibers are a type of plastic that can be consumed by marine animals, contributing to ocean pollution. It is important to consider the environmental impact of our everyday actions, in addition to coastal conservation efforts.

On the other hand, thrift shopping can help reduce the global environmental issue of clothing production and waste. Since thrift stores offer previously owned clothes, it encourages people to reuse existing items rather than buy new ones. This helps conserve energy that would have been used in the production process. Additionally, thrift shopping supports a circular economy by keeping clothes out of landfills and reducing pollution from synthetic microfibers.

Ultimately, thrift shopping is not only a great way to find unique items and save money but also an eco-friendly option that can help protect the environment. If you’re looking for some exciting deals that won’t hurt your wallet or the planet, then consider taking a look at your local thrift store.

Saving Money Can Also Mean Earning Money

Thrift stores often have discounted prices, allowing you to purchase items at a lower cost. As a result, you can buy and resell these items for some extra cash. Thrift stores often offer fantastic deals such as designer items and vintage pieces which you can find at a fraction of their original price.

Going Thrift Shopping Can Be Fun

Thrift shopping can be an enjoyable and distinct experience where you can discover rare items that you won’t find elsewhere. It also allows you to find valuable treasures at great prices. Most people never know what gems or unique pieces they might discover while browsing at a thrift store!

Tips for Thrift Shopping

1. Make a list of the items you’re looking for to help narrow down your search and save time.
2. Research the thrift store first to get an idea of what they offer.
3. Don’t be afraid to haggle for a better deal.
4. Take your time and thoroughly look through the racks.
5. Check clothes carefully for defects or stains before you purchase them.
6. Try on clothing items to ensure they fit before buying them.
7. Look through the clearance sections for more savings.
8. Wash clothes before wearing them to eliminate any dirt or bacteria.
9. Donate items that you don’t need anymore to support your local thrift store.
10. Spread the word and tell your friends about thrift shopping to help protect the environment.

Conclusion

Shopping at thrift stores is a cost-effective and eco-friendly way to shop. It reduces the environmental impact of fast fashion, slows down the accumulation of clothes in landfills, and decreases pollution from microfibers. You can find amazing deals, earn some extra money, and even find unique items. For sustainable shopping that saves money, check out your local thrift store!

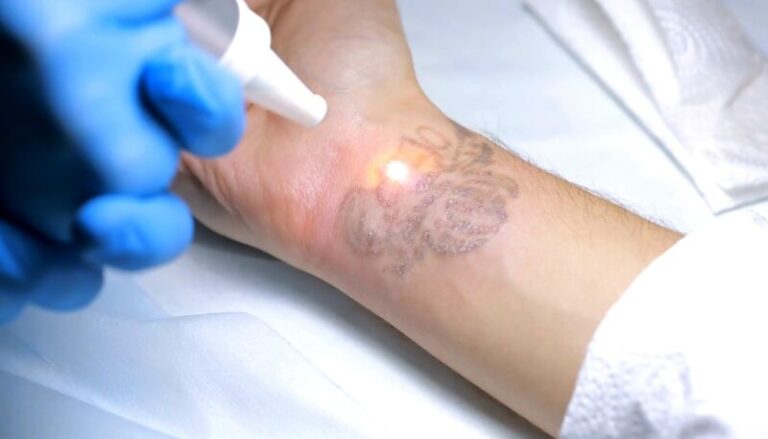
Recommended Read: How to Remove Tattoo at Home

How to Remove Tattoo at Home

0

Introduction

In the intricate tapestry of personal expression, tattoos have etched themselves as symbols of individuality and creativity. However, as life’s journey unfolds, so do our perspectives, leading some to seek ways to remove tattoos at home. The allure of at-home how to remove tattoo at home lies in the autonomy it offers, providing individuals with the ability to redefine their canvas in the comfort of familiar surroundings.

As we delve into the realm of unlocking the art through DIY removal methods, we embark on a journey through popular techniques, safety considerations, and the potential challenges associated with this personal choice. The desire to remove a tattoo at home is a nuanced exploration, encompassing natural ingredients, commercially available creams, and even emerging technologies like at-home laser devices.

This guide serves as a beacon for those navigating the possibilities and considerations of at-home tattoo removal. From anecdotes of successful journeys to cautionary tales, our exploration is grounded in a conversational style, embracing the complexities of personal decisions and artistic transformations. Whether you’re contemplating a change in your inked narrative or simply curious about the evolving world of how to remove tattoo at home, join us on this voyage through the art, science, and personal stories of how to remove tattoo at home.

While professional tattoo removal services are widely available, the appeal of at-home methods lies in their convenience and cost-effectiveness. DIY enthusiasts often explore methods that promise to fade or remove tattoos in the comfort of their homes.

Safety Considerations

Before embarking on any how to remove tattoo at home journey, it’s crucial to prioritize safety. The skin is a delicate canvas, and improper removal techniques can lead to adverse effects. This section emphasizes the importance of cautious approaches and understanding potential risks.

Natural Ingredients for How to Remove Tattoo at Home

Nature has long been a source of remedies, and some individuals turn to natural ingredients for tattoo removal. From lemon juice to aloe vera and salt, exploring the effectiveness of these substances provides insights into gentle fading methods.

DIY Tattoo Removal Creams

DIY tattoo removal creams have emerged as a popular choice for individuals seeking an at-home solution to fade or remove unwanted tattoos. These creams typically claim to break down the tattoo ink, gradually lightening the appearance of the tattoo over time. While the market offers a variety of these products, it’s essential to understand their components, application processes, and potential effectiveness.

Ingredients: DIY tattoo removal creams often contain a combination of active ingredients designed to penetrate the skin and target the tattoo ink. Common components include chemical exfoliants like alpha hydroxy acids (AHAs) or beta hydroxy acids (BHAs), which work to peel away layers of skin. Additionally, some creams may incorporate ingredients with purported tattoo-fading properties, such as glycolic acid, salicylic acid, or kojic acid.

Application Process: The application process of DIY tattoo removal creams typically involves cleansing the tattooed area thoroughly before applying the cream as directed by the product instructions. Users are advised to follow a specific routine, applying the cream consistently over a designated period. It’s crucial to avoid excessive sun exposure during this process, as the skin may become more sensitive.

Effectiveness: The effectiveness of DIY tattoo removal creams varies widely, and results can be influenced by factors such as the size and color of the tattoo, skin type, and the specific formulation of the cream. While some individuals may experience noticeable fading over time, others may find minimal to no impact on their tattoos. Patience is key, as tattoo removal is a gradual process, and consistent application is generally recommended for optimal results.

Considerations and Risks: Despite their popularity, DIY tattoo removal creams come with considerations and potential risks. Users should be aware of the possibility of skin irritation, redness, or allergic reactions. Additionally, the success of these creams may be limited, especially for tattoos with deep or dense ink. It’s essential to carefully read and follow the product instructions, conducting a patch test on a small area before widespread application.

Laser Devices for Home Use
Advancements in technology have introduced at-home laser devices for tattoo removal. We discuss the emergence of these devices, their potential effectiveness, and the importance of cautious usage.

Potential Challenges and Risks

While the allure of at-home removal is evident, it comes with challenges and risks. Readers are guided through an understanding of potential pitfalls, empowering them to make informed decisions.

Consulting with Professionals

In the pursuit of tattoo removal, the guidance of professionals cannot be overstated. This section emphasizes when and why consulting with a dermatologist or tattoo removal specialist is crucial for a safe and effective process.

Tips for Successful At-Home Removal

For those determined to embark on the DIY journey, practical tips are provided to enhance the effectiveness of at-home removal methods. From consistent application to skin care routines, readers are equipped with insights for success.
Managing Pain and Discomfort

Acknowledging that pain is often part of the removal process, this section offers practical tips for managing discomfort. From topical numbing creams to cooling techniques, readers can navigate the process more comfortably.

Real-Life Experiences

The power of shared experiences is undeniable. Real-life anecdotes from individuals who successfully removed tattoos at home add a personal touch to the guide, offering inspiration and lessons learned.

Tattoo Cover-Up Options

For those not ready to bid farewell to the world of tattoos entirely, temporary cover-up techniques are explored. Enhancing aesthetics while pursuing removal provides readers with alternative artistic possibilities.

Patience and Persistence

Tattoo removal, whether at home or professionally, requires a considerable amount of patience. Setting realistic expectations and understanding that results may take time are essential components of a successful removal journey.

Conclusion

As our exploration into the art of how to remove tattoo at home reaches its conclusion, we find ourselves at the crossroads of personal expression and transformation. The decision to remove a tattoo is not merely a physical process but a nuanced journey, intertwining self-discovery, autonomy, and the evolution of one’s narrative.

In bidding farewell to this guide, readers are reminded that the canvas of personal expression is vast and ever-changing. The desire to remove a tattoo at home reflects the dynamic nature of individual preferences and the pursuit of a canvas that aligns with the present self.

Whether one embarks on the journey armed with natural ingredients, explores the efficacy of commercial creams, or contemplates the potential of at-home laser devices, the guide stands as a companion through the complexities. It encourages informed decisions, emphasizing the importance of safety, patience, and an understanding of the potential challenges inherent in at-home tattoo removal.

The conclusion, much like the decision to how to remove tattoo at home, is not an endpoint but a transformation. It invites readers to reflect on the possibilities, choices, and personal narratives that unfold in the delicate interplay of ink, skin, and self-expression. As the journey concludes, the canvas remains open, awaiting the strokes of personal stories yet to be written.

FAQs

Q: Can all tattoos be removed at home?

A: The effectiveness depends on factors like tattoo size and ink colors.

Q: Are at-home laser devices safe to use?

A: Follow instructions carefully, but professional consultation is advised.

Q: How long does it take to see results with DIY methods?

A: Results vary; patience and consistency are crucial.

Q: What natural ingredients are effective for tattoo removal?

A: Lemon juice, aloe vera, and salt are commonly suggested.

Q: Can I remove a tattoo without any pain?

A: Some discomfort is typical, but pain management techniques can help.

Recommended Read: How to Use Afterpay on Amazon

How to Use Afterpay on Amazon

0

Introduction

In the ever-evolving landscape of online shopping, the desire for convenience and flexibility has become a driving force in shaping consumer preferences. As the popularity of Afterpay continues to soar, a pressing question echoes among avid Amazon shoppers: “How to use Afterpay on Amazon?” This inquiry represents the intersection of two major players in the e-commerce realm – Afterpay, renowned for its user-friendly installment payment system, and Amazon, the global giant that has revolutionized the way we shop.

Afterpay’s appeal lies in its ability to empower consumers, allowing them to split their total purchase into manageable installments, all without incurring interest. This has transformed the way budget-conscious shoppers approach online transactions, providing a level of financial flexibility that resonates with modern lifestyles.

However, the absence of Afterpay as a payment option on Amazon prompts a deeper exploration into the dynamics of e-commerce payment methods. This article aims to unravel the intricacies of using Afterpay on Amazon, exploring the current landscape, consumer demands, potential challenges, and the tantalizing prospect of a future partnership between these two industry giants. Join us on this journey as we navigate the terrain of online shopping desires and the evolving expectations of the modern consumer.

Understanding How to use Afterpay on Amazon

Before delving into the desire to integrate How to use Afterpay on Amazon, it’s essential to understand what Afterpay brings to the table. Afterpay operates on the principle of allowing users to split their total purchase into four equal payments, paid fortnightly. This installment-based system not only facilitates budget-conscious shopping but also enhances the overall shopping experience.

Current Amazon Payment Options

Amazon, being a global e-commerce giant, boasts an array of payment methods, from credit and debit cards to Amazon gift cards. However, one notable absence is the inclusion of Afterpay as a payment option. This presents a gap for users who have become accustomed to the convenience of Afterpay.

Why Use Afterpay on Amazon?

The appeal of using How to use Afterpay on Amazon lies in its advantages for consumers. Afterpay allows shoppers to break down the cost of their purchases into manageable chunks without incurring interest. This flexibility aligns with the preferences of budget-savvy consumers, providing them with a more accessible way to indulge in their shopping desires.

Limitations and Considerations

While the prospect of using How to use Afterpay on Amazon is enticing, it’s crucial to acknowledge potential limitations and considerations. Integrating Afterpay into the Amazon payment ecosystem poses challenges, both technically and logistically. Moreover, such a move would impact the dynamics between sellers and consumers.

Consumer Demand for Afterpay

The growing demand for How to use Afterpay on Amazonon major e-commerce platforms is evident. Consumers appreciate the transparency, simplicity, and interest-free nature of Afterpay’s installment plans. The desire for this payment option on Amazon reflects a shift in consumer preferences toward flexible and accessible payment methods.

Afterpay Integration Challenges

The journey toward using How to use Afterpay on Amazon faces hurdles. Integrating a third-party payment system involves navigating technical complexities and addressing potential conflicts with Amazon’s existing infrastructure. While challenges exist, exploring solutions and workarounds is essential for meeting consumer demands.

Alternatives to Afterpay on Amazon

As Afterpay remains absent from Amazon’s payment options, users can explore alternative installment payment methods offered by the platform. Understanding the features and limitations of these alternatives allows consumers to make informed decisions when managing their payments.

The Future of Afterpay and Amazon Partnership

While the integration of How to use Afterpay on Amazon is currently speculative, considering the potential collaboration presents exciting possibilities. A future partnership could offer mutual benefits, providing Afterpay users with more choices and enhancing Amazon’s appeal among a broader consumer base.

For Afterpay users eager to shop on Amazon, navigating the platform without this installment option is still a viable and straightforward process. Maximizing the available payment options, such as credit cards and Amazon store credit, ensures a seamless shopping experience.

Consumer Experiences with Afterpay

Real-life experiences of consumers using Afterpay add a personal touch to the discussion. Positive testimonials showcase how Afterpay has empowered shoppers to make purchases they might have otherwise deferred, contributing to increased customer satisfaction.

Seller Perspectives on Afterpay

Considering the impact of Afterpay on Amazon extends beyond consumer experiences to seller perspectives. Exploring the potential advantages and disadvantages for merchants sheds light on how the integration of Afterpay could influence the dynamics of the online marketplace.

Conclusion

As we conclude our exploration into the union of How to use Afterpay on Amazon, the landscape of e-commerce payment options stands as dynamic as ever. While the tantalizing prospect of using Afterpay on Amazon remains unfulfilled at present, the journey has unveiled the evolving expectations and desires of the modern consumer.

The popularity of Afterpay, characterized by its interest-free installment plans and user-friendly approach, reflects a broader shift in how individuals engage with online shopping. The allure of financial flexibility, allowing consumers to split payments seamlessly, has become a defining factor in the choices they make.

While Afterpay’s integration with Amazon is currently speculative, the discussion opens avenues for contemplating the future of e-commerce partnerships. As technology advances and consumer preferences evolve, the potential collaboration between these industry giants could redefine the landscape, offering users a broader array of payment options and enhancing the overall online shopping experience.

As we bid farewell to this exploration, the journey does not end; it merely transforms. Consumers are encouraged to stay informed about the ever-changing world of e-commerce payments, navigating the vast array of options available. The desire for flexibility, convenience, and financial empowerment continues to shape the narrative, leaving us eagerly anticipating what the future holds for the fusion of Afterpay and the e-commerce titan, Amazon.

FAQs

Q: Is Afterpay available as a payment option on Amazon?

A: Currently, Amazon does not support Afterpay.

Q: Can I use other installment payment methods on Amazon?

A: Yes, Amazon offers alternative installment payment options.

Q: Why is Afterpay popular among online shoppers?

A: Afterpay’s appeal lies in its flexibility and interest-free installment plans.

Q: Are there plans for Afterpay to partner with Amazon in the future?

A: While speculative, a potential collaboration could be mutually beneficial.

Q: How can I manage my budget on Amazon without Afterpay?

A: Utilize Amazon’s existing payment options and consider budgeting tools.

Recommended Read: How to Remove a Ring Doorbell

How to Remove a Ring Doorbell

0

Introduction

The ubiquitous of how to remove a Ring Doorbell has become a staple in modern home security, providing convenience and peace of mind. However, circumstances may arise that necessitate the removal of this smart device. Whether you’re upgrading, facing technical issues, or moving to a new home, knowing how to remove a Ring Doorbell is a valuable skill. In this guide, we’ll navigate the process step by step, empowering you to handle the removal with confidence.

Why Remove a Ring Doorbell?

Ring Doorbells, while durable, may require removal for various reasons. Perhaps you’re upgrading to a newer model, encountering technical glitches, or moving to a new residence. Whatever the reason, understanding why removal is necessary sets the stage for a smooth and efficient process. Careful removal is crucial not only to preserve the device but also to avoid potential damage during the procedure.

Tools Needed for Removal

Before embarking on the removal journey, ensure you have the right tools at your disposal. This includes screwdrivers, pliers, and safety equipment like gloves and safety glasses. Taking the time to gather these essentials minimizes the risk of complications and ensures a safe removal process.

Step-by-Step Removal Guide

Let’s dive into the practical aspect of removing a Ring Doorbell. The step-by-step guide covers everything from turning off power to disconnecting wires and uninstalling the device from its mounting bracket. Follow each step carefully to navigate the process seamlessly.

Dealing with Ring Doorbell Models

Ring offers a range of doorbell models, each with its unique features and installation nuances. This section provides specific instructions tailored to different Ring Doorbell versions, ensuring that users can navigate the removal process with confidence. Additionally, troubleshooting tips are included to address common issues that may arise during removal.

Ensuring Data Security

Given the smart nature of Ring Doorbells, ensuring the security of your data is paramount. Learn the importance of resetting the device and wiping data before removal. These steps safeguard your personal information and maintain privacy during the removal process.

Repair vs. Replacement

Understanding the purpose behind the removal is crucial. Whether it’s for repair or replacement, this section guides users in making informed decisions. Knowing when to repair the device and when to opt for a replacement can save time and effort in the long run.

Common Challenges and Solutions

While the removal process is generally straightforward, users may encounter challenges along the way. This section addresses common issues faced during how to remove a Ring Doorbell and provides practical solutions to overcome potential hurdles. Troubleshooting tips ensure a smoother experience.

Post-Removal Tips

Once the how to remove a Ring Doorbell process is done, the journey doesn’t end there. Learn how to clean and prepare the installation area for potential reinstallation. Proper storage of the device is also covered, ensuring its optimal condition for future use.

Choosing a New Location

For those planning to reinstall the Ring Doorbell or opt for a new one, this section offers tips on selecting an optimal location. Factors like visibility, Wi-Fi signal strength, and accessibility are discussed to guide users in making the right choices.

Reinstallation Guide

If your removal journey is followed by a reinstall, fear not. This section provides a comprehensive guide on reinstalling the Ring Doorbell. Step-by-step instructions and tips ensure a successful reinstallation, allowing you to enjoy the benefits of the device once again.

User Experiences and Tips

Real-world experiences from Ring Doorbell users add a personal touch to this guide. Learn from the challenges and triumphs of others, and gain additional tips for a successful removal and reinstallation process. The collective wisdom of the community enhances your understanding of the task at hand.

Conclusion

As we wrap up our comprehensive guide on how to remove a Ring Doorbell, it’s time to reflect on the journey we’ve undertaken. Removing a smart device like the Ring Doorbell might seem like a daunting task, but armed with the right knowledge and tools, it becomes a manageable and even empowering endeavor.

In concluding this guide, remember that the process is not merely about technical steps; it’s about adapting to the evolving landscape of smart home technology. Whether you’re replacing an old model, troubleshooting issues, or preparing for a move, the ability to handle the removal process confidently puts you in control of your technology.

Take pride in the fact that you’ve acquired a valuable skill – one that goes beyond the boundaries of your how to remove a Ring Doorbell. DIY projects contribute not only to the maintenance of your home but also to your personal growth and self-sufficiency.

As you navigate the realms of removal, reinstallation, and troubleshooting, remember that the Ring community is vast, and experiences are shared. Your journey is not solitary; it’s part of a collective effort to make the most of smart home technology.

So, whether you’re bidding farewell to an old friend or preparing to welcome a new Ring Doorbell into your home, approach the process with confidence and the knowledge that you’ve mastered the art of how to remove a Ring Doorbell.

FAQs

Q: Can I reinstall the how to remove a Ring Doorbell?

A: Yes, following the proper steps ensures a seamless reinstallation process.

Q: Do I need professional help for removal?

A: In most cases, it’s a DIY task, but professionals can assist if needed.

Q: Will removing the Ring Doorbell erase my data?

A: Resetting the device is crucial; however, data can be wiped to ensure security.

Q: What if the wires are challenging to disconnect?

A: Patience and following the device’s manual can help navigate this issue.

Q: Can I reuse the same mounting bracket for a new installation?

A: Yes, as long as the bracket is in good condition, it can be reused.

Recommended Read: How to Remove a Broken Bolt

How to Remove a Broken Bolt

0

Introduction

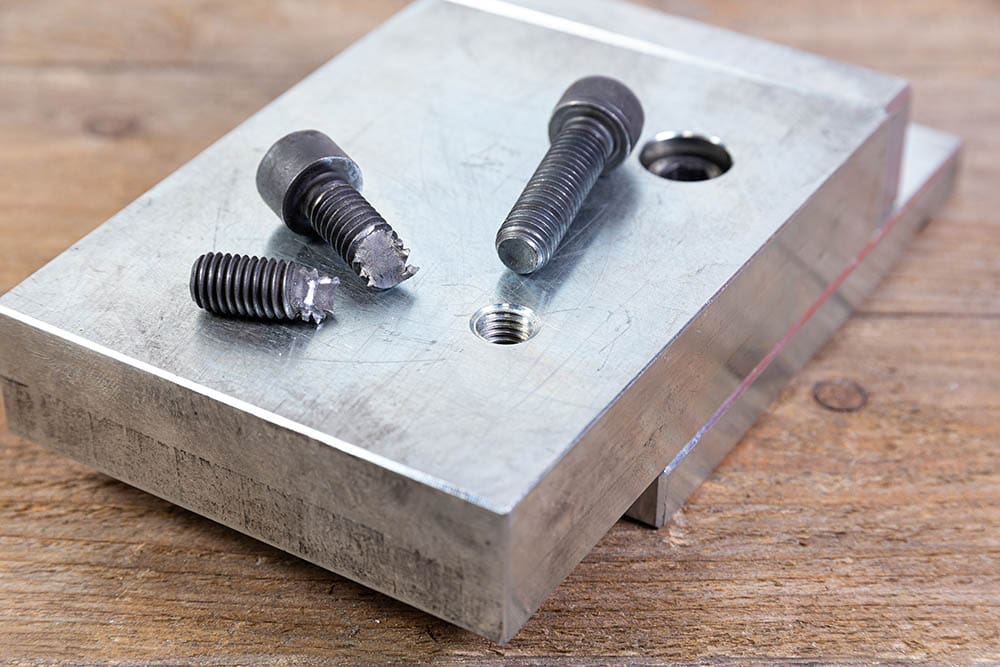
Embarking on a DIY project can be a thrilling endeavor, but when confronted with the stubborn challenge of a broken bolt, frustration often takes center stage. Whether you’re a seasoned DIY enthusiast or a novice, the ordeal of dealing with a fractured bolt is a universal woe. In this guide, we will unravel the mysteries of how to remove a broken bolt, providing you with a comprehensive roadmap to tackle this common issue.

Bolts break for various reasons, from rust and corrosion to overtightening or age-related fatigue. The significance of promptly addressing a broken bolt cannot be overstated, as neglecting this seemingly minor issue can lead to larger problems down the line. This guide is crafted for those seeking a DIY solution, offering step-by-step insights into the entire process.

Throughout this journey, we will delve into the intricacies of understanding bolt breakage, selecting the right tools, and employing various techniques to effortlessly remove the broken bolt. By the end of this guide, you’ll be equipped with the knowledge and confidence to face this challenge head-on, transforming a potential setback into a triumph of DIY prowess. So, roll up your sleeves, gather your tools, and let’s navigate the world of broken bolts together.

Understanding the Bolt Breakage

When faced with the challenge of a how to remove a broken bolt, the first step toward resolution lies in unraveling the mystery behind why bolts break in the first place. Bolts can succumb to various stressors, and comprehending these factors is pivotal for effective removal.

  1. Material Fatigue: Bolts, especially those subjected to constant stress or load-bearing conditions, can succumb to material fatigue over time. This is often a result of cyclic loading and unloading, causing the metal to weaken and eventually lead to a break.
  2. Corrosion and Rust: Exposure to the elements, particularly in outdoor or humid environments, can trigger corrosion on bolt surfaces. The formation of rust not only weakens the structural integrity of the bolt but also increases friction during removal.
  3. Over-tightening: Applying excessive force during the tightening process can result in over-tightening, causing the bolt to reach a stress point beyond its capacity. This stress concentration may eventually manifest as a break, especially in bolts with lower tensile strength.
  4. Poor-Quality Bolts: The quality of the bolt itself plays a crucial role. Substandard materials or manufacturing processes can make bolts more susceptible to breakage, especially when exposed to challenging conditions.
  5. Environmental Conditions: Extreme temperatures, vibrations, or sudden impacts can contribute to bolt breakage. Bolts in machinery or automotive components, for instance, may experience these conditions regularly, increasing the risk of failure.

Understanding these contributing factors is the cornerstone of effective bolt removal. It allows DIY enthusiasts and mechanics alike to tailor their approach based on the specific circumstances, ultimately increasing the likelihood of a successful resolution. Armed with this knowledge, individuals can navigate the complexities of bolt breakage with confidence and precision.

Tools and Safety Gear

Ensuring a successful broken bolt removal process goes beyond knowing the techniques; it’s about having the right tools and prioritizing safety. The combination of proper equipment and safety measures not only enhances efficiency but also safeguards against potential hazards.

  1. Wrenches and Pliers:
    • Adjustable Wrenches: Ideal for gripping and turning the bolt, adjustable wrenches come in various sizes to accommodate different bolts.
    • Locking Pliers (Vice Grips): These provide a secure grip on the bolt, preventing slippage during removal.
  2. Safety Glasses and Gloves:
    • Safety Glasses: Protect your eyes from debris, especially when using tools like drills or hammers.
    • Gloves: Wear sturdy gloves to shield your hands from sharp edges, hot surfaces, or chemicals.
  1. Penetrating Oil:
    • WD-40 or PB Blaster: Applying penetrating oil helps lubricate the bolt, easing its removal by reducing friction. Let it sit for some time to maximize effectiveness.
  2. Heat Source:
    • Propane Torch or Heat Gun: Heat can expand metal, aiding in the loosening of a stubborn bolt. Exercise caution and follow safety guidelines when applying heat.
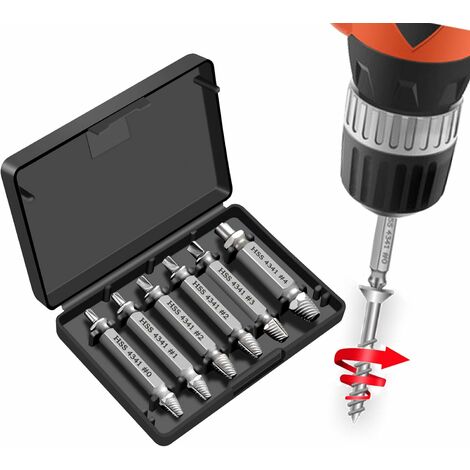
  3. Bolt Extractors:
    • Screw Extractor Set: These specialized tools are designed to grip into the bolt and facilitate its removal. Available in various sizes, they offer versatility.
  4. Drill and Drill Bits:
    • Corded or Cordless Drill: Used for drilling into the broken bolt when other methods fail.
    • Left-Hand Drill Bits: These can extract the bolt while drilling, utilizing the bolt’s own rotation.
  5. Tapping Tools:
    • Tap and Die Set: When creating new threads is necessary, tapping tools are invaluable for the extraction process.
  6. Chemical Solvents:
    • Rust Dissolvers: Products like Rust-Oleum or Liquid Wrench can dissolve rust, making it easier to remove the bolt.
  7. Thread Lubricant:
    • Anti-Seize Compound: Applying this to bolts during reinstallation can prevent future corrosion and make removal easier.
  8. Safety Precautions:
    • Eye Protection: Always wear safety glasses to shield your eyes from debris.
    • Gloves: Sturdy gloves protect your hands from cuts, scrapes, and exposure to chemicals.
    • Work Area Ventilation: When using chemicals or a torch, ensure proper ventilation to avoid inhaling fumes.
    • Fire Safety: Keep a fire extinguisher nearby when using heat sources.

Equipping yourself with these tools and safety measures sets the foundation for a successful broken bolt removal endeavor. Always prioritize safety and choose the tools that best match the specifics of your situation.

Assessment of the Situation

Carefully inspect the broken bolt, considering its size and type. Knowing what you’re dealing with is essential for choosing the right removal method.

Preparation Steps

Lubrication is key to easing the bolt removal process. Learn the art of proper lubrication and the use of penetrating oil for smoother removal.

Different Removal Methods

From traditional tools like pliers to specialized bolt extraction tools, explore various methods to find what suits your situation best.

Heat Application Techniques

Unlock the power of heat in loosening a stubborn bolt. Understand the thermal expansion principle and apply heat safely to expedite the removal process.

Use of Chemicals

Chemical solvents can work wonders on rusted bolts. Discover the right products and precautions for effective chemical application.

Drilling as a Last Resort

When all else fails, drilling becomes a viable option. Follow a step-by-step guide on drilling into the broken bolt and choosing the right drill bit.

Tapping and Extracting

Learn the art of tapping and extracting, a technique that involves creating new threads and extracting the broken bolt with relative ease.

Preventive Measures

Prevention is the best cure. Acquire tips on avoiding future bolt breakage through regular maintenance practices.

Common Mistakes to Avoid

Educate yourself on common mistakes that might exacerbate the situation, and benefit from the experiences of others who have faced similar challenges.

When to Seek Professional Help

Recognize the signs indicating when it’s time to admit defeat and seek professional assistance. Choose a reliable mechanic or technician for complex bolt removal scenarios.

Conclusion

In conclusion, the journey of removing a broken bolt is not merely a mechanical task; it’s a testament to the resilience and resourcefulness of the DIY spirit. As we wrap up this guide, it’s essential to recap the key takeaways that will empower you in your future encounters with stubborn bolts.

Mastering the art of how to remove a broken bolt involves a holistic approach, from understanding the intricacies of bolt breakage to employing the right tools and techniques. The importance of meticulous preparation, safety precautions, and patience cannot be overstated. Remember, each broken bolt tells a unique story, and your ability to decipher it will determine your success.

By incorporating the preventive measures discussed and learning from common mistakes, you’ll not only overcome the immediate challenge but also fortify your skills for future endeavors. DIY enthusiasts, whether seasoned or novice, should embrace each broken bolt as an opportunity to hone their craft.

So, as you venture into the realm of DIY repairs, armed with the knowledge gained from this guide, take pride in the fact that you’ve not only conquered a broken bolt but also added another feather to your DIY cap. Happy fixing!

FAQs

  1. Q: Can I use regular pliers to remove a broken bolt?
    • A: While regular pliers can help, specialized tools are more effective.
  2. Q: Is it safe to apply heat to a broken bolt?
    • A: Yes, but precautions must be taken to avoid damage or injuries.
  3. Q: How can I prevent bolts from breaking in the first place?
    • A: Regular maintenance, lubrication, and proper tools can help prevent breakage.
  4. Q: Can I reuse a bolt that has been removed?
    • A: It depends on the condition of the bolt; thorough inspection is recommended.
  5. Q: When should I admit defeat and seek professional help?
    • A: If all DIY attempts fail or if the situation worsens, professional assistance is advisable.

Recommended Read: How To Clean Nike Shoes?

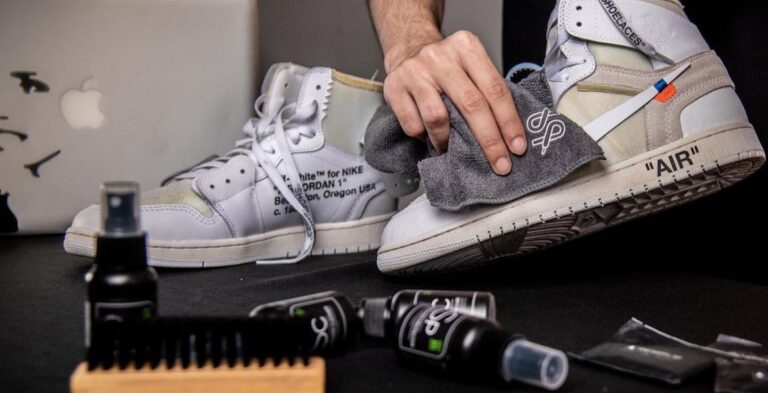
How To Clean Nike Shoes?

0

Indulge in the enchantment of regular cleanings to ensure your shoes maintain a fresh and delightful aroma! Uncover the hidden knowledge of How To Clean Nike Shoes as we delve into the depths of this magical process. Let us embark on this journey together!

Supplies for Cleaning Nike Shoes

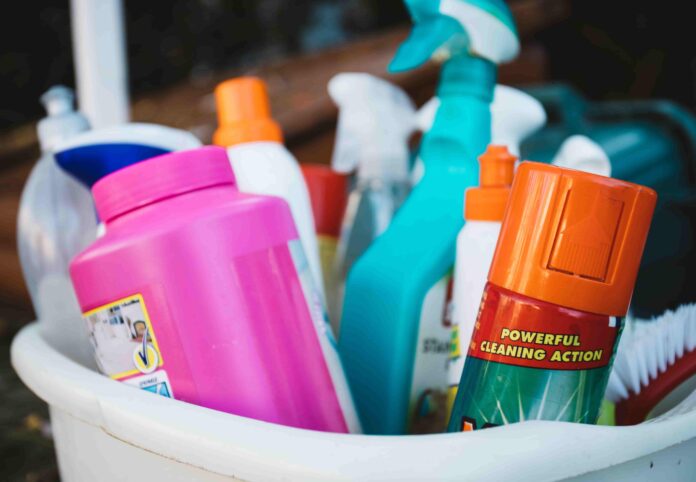
Dish Soap: Use a mild dish soap or detergent that is free of harsh chemicals and fragrances.

Baking Soda: Baking soda is great for removing dirt and grime from your Nike shoes.

Household Cleaning Eraser: To get a more intense clean, use a household cleaning eraser.

Leather Conditioner: To rejuvenate your leather shoes, use a trusted leather conditioner to restore and protect the material.

White Vinegar: White vinegar is a natural cleaner and can be used to remove odors.

Tools For Cleaning Nike Shoes

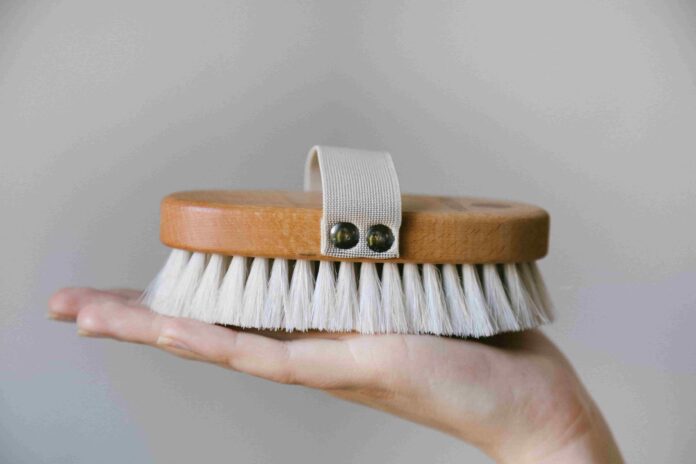
Soft Bristled Shoe Brush: Use a soft-bristle brush to gently scrub away dirt and grime from the outside of your Nike shoes.

Soft Cloth: A damp cloth or microfiber cloth can be used to remove excess dirt and dust.

Toothbrush: An old toothbrush or baby toothbrush is great for getting into all those tight spots on your shoes.

Soft Towel: Have a soft towel on hand to absorb any excess moisture.

Suede Brush: Use a suede brush to give your shoes a gentle brushing and make them look as good as new.

Steps to Cleaning Nike Shoes

Cleaning Nike shoes can be more complex compared to shoes with solid surfaces. The mesh material requires delicate handling to prevent any potential damage or stretching. However, rest assured as we offer a comprehensive set of tips and tricks specifically tailored to assist you in regularly cleaning your Nike shoes, especially those made with Nike Mesh. Let us explore the most effective methods to maintain the fresh and pristine appearance of your Nike shoes.

Maintaining the pristine condition of your shoes is always a challenge, particularly without regular cleaning. Once those brand new sneakers are out of the box, the temptation to take them for a spin outside is hard to resist. However, as you venture outdoors, they inevitably encounter various elements like dirt, mud, direct sunlight, scuffs, and stubborn stains that pose a threat to their flawless appearance.

If you’re struggling to keep your Nike mesh shoes clean, consider trying our Vessi shoes as a fantastic alternative. Not only are Vessi shoes stylish and comfortable, but they’re also incredibly easy to clean thanks to their 100% waterproof material. Unlike mesh shoes, Experience the magic of Vessi shoes – no more worrying about dirt and stains. Cleaning them is a breeze! With Vessi shoes, you can bid adieu to stubborn marks on your favorite sneakers. What’s more, Vessi shoes are eco-friendly, allowing you to make a responsible choice while keeping your kicks looking flawless.

To ensure your sneakers perform at their best, it’s crucial to take proper care of them, including regular cleaning. Before you begin cleaning, use a shoe tree or crumpled newspapers to maintain their shape. Afterward, you may proceed with the cleaning procedure.

Discover these incredible tips to maintain the freshness and cleanliness of your sneakers, whether they’re lifestyle, basketball, or running shoes. With just a few simple steps, you’ll be rocking fresh kicks.

Step By Step Guide Cleaning Solution: How to Clean Nike Shoes

1. Use a Dry Brush For Cleaning Nike Shoes

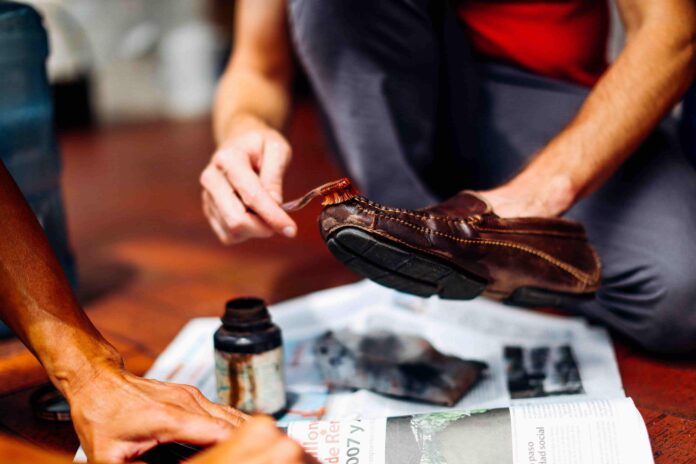
Start by removing any dirt or debris with a soft-bristled brush or an old toothbrush. This will help dislodge the stubborn marks that have embedded themselves in the fabrics of your shoes. Make sure to move the brush along the shoe in circular motions for a thorough cleaning.

2. Use Mild Soap, Mild Laundry Detergent & Water for Cleaning Nike Shoes

Next, prepare a mixture of warm water and mild liquid soap or mild laundry detergent. Gently submerge your shoes in the soapy solution for a few minutes to allow the dirt to loosen up. Use a soft cloth or sponge to scrub away any remaining dirt before rinsing the shoes with cold water.

To keep your white and light-colored shoes looking their best, you can create a highly effective cleaning paste by combining equal amounts of baking soda and water. This simple mixture works wonders in restoring the pristine of your beloved footwear.

Cautions:

For shoes with leather material, avoid submerging them in water as this can damage the material. If your shoes have a suede or nubuck finish, use lukewarm water and a non-abrasive brush to gently clean away any dirt or debris. To use dish soap correctly, dilute it generously with water. Applying a concentrated amount of dish soap or cleaning solution on certain materials can cause discoloration or deplete natural oils.

3. Wash the Laces For Cleaning Nike Shoes

For best results, take out the shoelaces and soak them in the same cleaning solution or laundry detergent. When they are done soaking, scrub away any dirt or stains with a soft toothbrush. Rinse off with cold water before air-drying on a towel.

4. Wash the Soles For Cleaning Nike Shoes

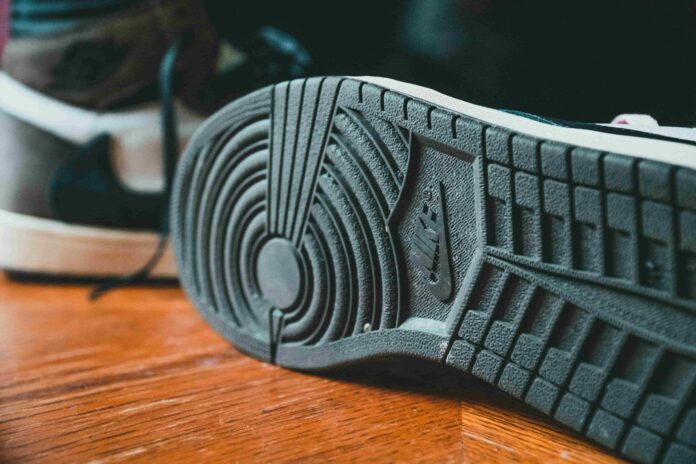
The soles of your Nike shoes often bear the brunt of daily wear and tear. To clean them, first, remove any visible dirt or pebbles lodged in the outsole grooves. Then, create a mixture of baking soda and a small amount of water to form a thick paste. Apply this paste to the soles and scrub with a toothbrush or soft brush, paying special attention to areas that are heavily soiled. The baking soda acts as a gentle abrasive to remove stubborn dirt without damaging the material of the sole. Rinse off the paste with warm water and pat dry with a towel. Remember not to submerge the entire shoe in water to avoid any potential damage to the upper parts of the shoe.

Before washing the insoles, remember to remove them from the shoes. Clean them using the solution provided, and make sure to allow ample time for them to dry completely before placing them back in the shoes.

5. Wash The Upper Part For Cleaning Nike Shoes

To clean the upper part of the shoe, first apply a generous amount of mild liquid soap onto a damp cloth, soft-bristled brush, or toothbrush and gently scrub away any dirt and remove stains. When you’re done cleaning, rinse off with cold water and pat dry with a towel. To restore luster to your shoes’ uppers, apply a small amount of leather conditioner on a soft cloth and buff the shoe.

6. Remove Odors For Cleaning Nike Shoes

To remove any odors from your shoes, you can use a combination of white vinegar and warm water. Soak a cloth in the solution and gently wipe down the insides of your shoes to eliminate any bad smells.

7. Apply Leather Conditioner for Cleaning Nike Shoes

If you have leather sneakers, it’s important to condition them to maintain their appearance. Use a trusted leather conditioner and apply it according to the instructions on the package.

8. Allow Shoes To Air Dry For Cleaning Nike Shoes

Once you’ve finished cleaning your shoes, allow them some time to air dry. Place them near a window or in an open area away from direct sunlight or heat sources. This will help prevent any damage to the material and keep your shoes looking as good as new.

Factors to Keep in Mind When Cleaning Of Different Materials of Nike Shoes

It’s important to keep in mind that different materials will require different cleaning methods. Therefore, it’s vital to understand what material your shoes are made from before you begin the cleaning process. Below are a few valuable suggestions to assist you:

  • For Nike leather shoes, use a special leather soap or saddle soap as these work best for preserving the natural oils in the material.
  • For suede or nubuck shoes, use a soft brush to clean away dirt and then apply a special waterproofing agent to protect from stains.
  • For canvas shoes, use warm water and mild liquid detergent or soap to gently scrub away dirt before rinsing with cold water.
  • For synthetic materials, such as mesh or nylon, use warm water and a small amount of mild liquid detergent.
  • For foam materials, such as Nike’s Ultra Comfort Foam technology, clean with warm water and mild soap before air drying.

How to Clean Nike Leather Shoes

Leather shoes require the most care when it comes to cleaning and preserving them. To keep your leather Nike shoes looking their best, use a gentle cleaner specifically designed for leather footwear. Follow the instructions on the package carefully and apply according to directions.

To remove stains from your shoes, begin by using a dry brush and a mild dish soap solution. You can also try a household cleaning eraser or leather conditioner for the best outcome. Remember to avoid excessive scrubbing, as this could potentially damage the leather.

How to Clean Nike Suede Shoes?

Cleaning suede can indeed be quite a challenge. If you happen to spot watermarks, scuffs, dirt, or stubborn stains, it’s a clear sign that your beloved suede shoes are in need of a thorough cleaning. But fret not! With the right techniques and tools at your disposal, you can easily restore them to their original glory.

To begin the cleaning process, grab a suede brush or a soft towel and gently remove any surface debris, making sure to always brush in the same direction as the material’s grain. This will help lift off any loose dirt or dust.

Next, for those pesky marks on the shoe’s surface, employ a suede rubber or a pencil eraser. Carefully and patiently rub them away, applying gentle pressure to avoid damaging the delicate suede.

But what about those stubborn stains that just won’t go away, no matter what you try? Fear not, for there’s a solution! Dampen a clean cloth with white vinegar and diligently scrub the stained areas, alternating directions to ensure a thorough clean. The vinegar will help break down the stains, leaving your suede shoes looking fresh and clean.

Remember, patience is key when it comes to cleaning suede. Take your time, follow these recommended techniques, and utilize the right tools for the job. By doing so, you’ll be able to restore your suede shoes to their original glory and enjoy their timeless elegance for years to come.

How to Clean Nike Knit Shoes?

Knit shoes are stylish and comfortable, making them a popular choice in footwear. While they may be more low-maintenance than other shoe types, it’s still important to treat them with care and give them a proper clean every once in a while.

For the upper part of your knit shoe, use a soft cloth that is lightly dampened with warm water and a mild liquid detergent. Gently scrub away any dirt or grime, taking care not to get the fabric too wet as this could cause stretching or shrinkage.

For the foam midsole, use a sponge or soft-bristled brush with warm water and mild liquid soap. Scrub away at any dirt on the material before rinsing off with cold water. Once finished, air dry your shoes away from direct heat sources or sunlight.

By following these simple steps you can help keep your knit shoes looking their best and guarantee a comfortable fit as they age.

How To Clean Nike Mesh Shoes

Mesh shoes are designed for maximum breathability and comfort, making them a great choice for active lifestyles. To keep Clean Mesh Shoes looking as good as new, it’s important to give them the occasional cleaning to remove any dirt or grime buildup.

Start by removing any laces from your mesh shoes before taking a soft cloth that has been soaked in warm water and mild liquid detergent. Gently scrub away any dirt or scuffs before rinsing off with cold water.

Once finished, make sure to air dry your mesh sneakers away from any direct heat sources or sunlight. This will help protect the mesh fabric and prevent it from shrinking or stretching over time.

By following these simple steps you can keep your mesh shoes looking great and guarantee they last for many years to come.

Important Tips to Enhance the Cleaning of Nike Shoes

  • Always unlace your shoes before cleaning them. This will allow you to clean the tongue of the shoe and other harder-to-reach areas.
  • Avoid soaking your shoes in water. This can break down the glue that holds them together and cause them to lose their shape.
  • Do not use harsh chemicals or bleach on your shoes as this can discolor or damage the materials.
  • Consider using a shoe protector spray, especially for suede and leather shoes. This will add a layer of protection against water and stains.
  • If your shoes are particularly smelly, try sprinkling baking soda inside and let it sit overnight. Baking soda effectively eliminates odors by absorbing them.
  • Always check the label of your cleaning products to ensure they are safe to use on your specific shoe material.
  • Remember that regular cleaning can extend the lifespan of your shoes. Try to clean them once every few weeks, depending on how frequently you wear them.
  • For drying, stuffing your shoes with newspaper can help maintain their shape and absorb any excess moisture.
  • Always store your shoes in a cool and well-ventilated area to prevent the growth of mold and mildew.

Faqs For Cleaning Nike Shoes

Q. Is it OK to wash my Nike shoes?

A. Yes, it’s perfectly fine to wash your Nike shoes as long as you follow the appropriate cleaning instructions for the specific material they are made of. Make sure to use mild soaps and avoid soaking them in water.

Q. Is it OK to wash Nike shoes in the washing machine?

A. No, it’s not recommended to wash your Nike shoes in a washing machine due to the risk of damaging the material and potentially shrinking or stretching them out. It’s best to hand-wash using mild soaps and cool water instead.

Q. Can I wash my Nikes with Dawn?

A. Yes, you can use Dawn or a similar mild detergent to clean your Nike shoes. Just make sure you follow the proper instructions for the specific material they are made of.

Q. What setting do you wash Nike shoes in the washing machine?

A. It’s not recommended to wash your Nike shoes in a washing machine due to the risk of damaging them. To ensure their longevity, it’s best to hand-wash using mild soaps and cool water instead.

Q. How do I dry my Nike shoes after Washing?

A. After hand-washing your shoes, it’s best to stuff them with newspaper or paper towels and let them air dry away from direct heat sources or sunlight. You can also use a fan to help speed up the drying process. Avoid using a hairdryer as this could damage the materials.

Q. Can I put Nikes in the dryer?

A. No, it’s not recommended to put your Nike shoes in the dryer as this will likely cause them to shrink or lose their shape. It’s best to stuff your pair of sneakers with newspaper and let them air dry completely. If needed, you can also use a fan to help speed up the process.

Q. How do I clean the soles of my Nike shoes?

A. For the sole of your shoes, use a sponge or soft-bristled brush with warm water and mild liquid soap. Gently scrub away any dirt before rinsing off with cold water. Once finished, air dry your shoes away from direct heat sources or sunlight. This will help to keep your shoe soles

Q. Is dish soap good to clean shoes?

A. Yes, dish soap can be used to clean your shoes as long as you use a mild-formulated one and follow the appropriate instructions for the material they are made of. Just make sure to rinse all of the soap off before air drying your shoes away from direct heat sources or sunlight.

Q. How do I get scuff marks off my Nike shoes?

A. To remove scuff marks from your Nike shoes, use a damp cloth with either white vinegar or baking soda. Gently scrub away at the stain, taking care not to get the fabric too wet as this could cause stretching or shrinkage. If needed, you can also try a magic eraser for tougher stains.

Q. Can I wash Nike Air Force 1s with water?

A. Yes, it’s perfectly fine to wash your Nike Air Force 1 with water as long as you use mild soaps and cool water. Just make sure while clean Air Force 1s to avoid soaking them in water for too long and let them air dry away from direct heat sources or sunlight instead.

Q. Can I wash Nike Mesh or Knit Pattern shoes?

A. Yes, you can wash Nike Mesh or Knit Pattern shoes as long as you use a soft cloth that is lightly dampened with warm water and a mild liquid detergent. Gently scrub away any dirt or grime, taking care not to get the fabric too wet as this could cause stretching or shrinkage. Once finished, air dry your shoes away from direct heat sources or sunlight.

Recommended Read: How to Use Your Aroma Rice Cooker

How to Use Your Aroma Rice Cooker

0

Introduction

In the bustling world of culinary innovation, the How to use your aroma rice cooker emerges as a kitchen companion, revolutionizing the way we approach rice preparation. With its intuitive design and technological prowess, the How to use your aroma rice cooker has become a staple for both novice cooks and seasoned chefs alike. The gentle hum of its operation is a symphony of efficiency, promising perfectly cooked rice with every use.

How to use your aroma rice cooker, a versatile culinary ally, caters not only to the art of crafting flawless white rice but extends its capabilities to embrace the nutty richness of brown rice, the fragrant allure of jasmine, and the distinct grains of basmati. As we delve into the intricate dance of water and rice within this culinary marvel, it’s evident that the How to use your aroma rice cooker transcends the boundaries of a conventional kitchen appliance.

In this exploration, we’ll unravel the secrets behind maximizing the potential of your aroma rice cooker, ensuring that every grain embodies perfection. Join us on a journey through aromatic kitchens and delectable creations, where the aroma rice cooker takes center stage, transforming mundane grains into culinary masterpieces. Discover the simplicity and sophistication encapsulated in this kitchen essential, as we delve into the heart of what makes the aroma rice cooker an indispensable asset in modern gastronomy.

Understanding How to Use Your Aroma Rice Cooker

In the realm of kitchen appliances, tHow to use your aroma rice cooker stands out as a versatile and indispensable tool for both novice cooks and culinary enthusiasts. This comprehensive guide aims to unravel the mysteries of your aroma rice cooker, providing detailed insights into its features, functions, and the myriad ways it can elevate your cooking experience.

A. Getting Acquainted with Your Appliance:
  • Start by familiarizing yourself with the various components – the inner pot, steam tray, and lid – to understand how they work together seamlessly.
  • Explore the control panel and its settings, which often include options for different types of rice, steaming, and keeping your food warm.
B. Mastering the Basics of Rice Cooking:
  • Dive into the basics of cooking different types of rice – from fluffy white rice to the heartier brown and wild rice. Understand the water-to-rice ratio for optimal results.
  • Experiment with the different pre-programmed settings to tailor the cooking process to your preferred rice texture.
C. Beyond Rice: Multifunctionality Unveiled:
  • Discover the versatility of your aroma rice cooker by exploring its capabilities beyond rice. Learn to steam vegetables, cook grains, and even create one-pot dishes with ease.
  • Experiment with various ingredients and seasonings to customize your meals effortlessly.
D. Time and Temperature: Precision Cooking:
  • Delve into the nuances of time and temperature adjustments, understanding how they impact the cooking process. Learn to fine-tune your recipes for the perfect outcome.
  • Utilize the delay timer feature for convenient meal planning, allowing you to have freshly cooked food exactly when you need it.
E. Care and Maintenance: Extending the Lifespan:
  • Grasp the essentials of cleaning and maintaining your aroma rice cooker. Tips on removing lingering odors and keeping the appliance in top-notch condition.
  • Understand safety measures to ensure worry-free usage and prolong the life of your kitchen companion.
F. Troubleshooting: Addressing Common Concerns:
  • Navigate through common troubleshooting scenarios, from issues with cooking times to potential malfunctions. A guide to identifying and resolving problems promptly.

This guide aims to empower you with the knowledge needed to unlock the full potential of your aroma rice cooker. As you embark on this culinary journey, may your kitchen be filled with the enticing aroma of perfectly cooked grains and delectable meals, courtesy of your newfound kitchen ally.

Step-by-Step Guide on How to Use Your Aroma Rice Cooker

A. Preparing the Rice

The journey to flawless rice begins with choosing the right type and quality. Rinse your rice thoroughly to remove excess starch, ensuring a perfect texture in the final dish.

B. Measuring Water and Rice Ratios

Achieving the ideal rice texture requires precision in measuring water and rice ratios. A general guideline is one part rice to two parts water, but slight adjustments may be needed based on rice type.

C. Choosing the Right Settings

Understanding your aroma rice cooker’s settings is crucial. From white rice to brown, and even specialized settings for sushi or porridge, each option caters to specific culinary preferences.

D. Turning On the Aroma Rice Cooker

Once your ingredients are in place, close the lid securely, select the desired settings, and let the aroma rice cooker work its magic. The intelligent design ensures even cooking, letting you focus on other kitchen tasks.

Tips for Optimal Results

A. Adding Flavor to Your Rice

Elevate the taste of your rice by experimenting with additional ingredients. From herbs and spices to a knob of butter, aroma rice cookers provide a canvas for culinary creativity.

B. Cooking Different Types of Rice

Beyond the realm of white rice, aroma rice cookers excel in cooking diverse varieties like brown rice, quinoa, or even risotto. Adjust settings accordingly for impeccable results.

C. Cleaning and Maintaining Your Aroma Rice Cooker

Effortless maintenance is a hallmark of aroma rice cookers. After each use, wipe the interior with a damp cloth, and remove the inner pot for a thorough clean. Regular maintenance ensures longevity and consistent performance.

Benefits of How to use your Aroma Rice Cooker

A. Time and Energy Efficiency

Busy kitchens appreciate the swift cooking times of aroma rice cookers, reducing the overall meal preparation duration. The energy efficiency of these appliances is an added eco-friendly bonus.

B. Consistency in Cooking

Say goodbye to unevenly cooked rice. Aroma rice cookers guarantee uniform results every time, making them a trustworthy companion for daily meals or special occasions.

C. Versatility in the Kitchen

The versatility of aroma rice cookers extends beyond rice. They seamlessly transition to cooking grains, steaming vegetables, or preparing one-pot dishes, amplifying their utility in the kitchen.

Real-Life Experiences

A. Testimonials from Users

Discover the firsthand experiences of users who have welcomed aroma rice cookers into their kitchens. Their stories illuminate the transformative impact of these appliances on daily cooking routines.

B. Success Stories and Creative Recipes

Explore success stories where home chefs have pushed the boundaries of rice cooker creativity. From unconventional recipes to innovative uses, the possibilities with aroma rice cookers are boundless.

Comparison with Other Rice Cooking Methods

A. Aroma Rice Cooker vs. Traditional Stovetop

Pit aroma rice cookers against traditional stovetop methods, highlighting the advantages of the former, such as hands-free cooking and consistent results.

B. Advantages of Aroma Rice Cooker over Other Appliances

While there are various kitchen appliances for rice cooking, delve into why aroma rice cookers stand out, emphasizing their versatility, ease of use, and time-saving capabilities.

Conclusion

In concluding our exploration of the How to use your aroma rice cooker, it becomes evident that this kitchen marvel is more than just an appliance; it’s a gateway to culinary excellence. As we navigate the rich tapestry of features and possibilities, one can’t help but appreciate the simplicity and versatility this device brings to our kitchens.

The aHow to use your aroma rice cooker, with its user-friendly design and multifunctionality, stands as a testament to the marriage of convenience and culinary precision. It transforms the often mundane task of rice preparation into a seamless and enjoyable experience, offering a spectrum of grain-cooking options and even venturing into the realm of steamed vegetables.

Embracing the aroma rice cooker means embracing a culinary ally that empowers both novice cooks and seasoned chefs. The insights shared throughout this exploration aim to demystify the appliance, providing practical tips and creative ideas to make the most of its capabilities.

As you embark on your aroma rice cooker journey, let this knowledge be your guide, turning each cooking session into a delightful adventure. May your kitchen be filled with the aroma of perfectly cooked grains, reflecting the harmony of technology and tradition in the heart of your home.

FAQs

Q: How do I clean my aroma rice cooker?

A: Cleaning your aroma rice cooker is a simple process. After each use, unplug the appliance, remove the inner pot, and wipe down the interior with a damp cloth. The inner pot is dishwasher-safe, making cleanup a breeze. Regular maintenance ensures longevity and optimal performance.

Q: Can I cook types of rice other than white rice in my aroma rice cooker?

A: Absolutely! Aroma rice cookers are versatile and can handle a variety of rice types, including brown rice, basmati, jasmine, and more. Simply adjust the water-to-rice ratio and select the appropriate setting for the best results.

Q: What can I do to add flavor to my rice cooked in an aroma rice cooker?

A: Enhancing the flavor of your rice is easy. Experiment with different herbs, spices, or even a splash of broth. You can also add a knob of butter or a drizzle of olive oil for added richness. Get creative and tailor your rice to complement the rest of your meal.

Q: How long does it take for an aroma rice cooker to cook rice?

A: The cooking time depends on the type of rice and the quantity being prepared. On average, white rice takes about 15-20 minutes, while brown rice may require 30-40 minutes. The aroma rice cooker’s intelligent design ensures efficient and timely cooking.

Q: Can I steam vegetables or cook other grains in my aroma rice cooker?

A: Yes, you can! Aroma rice cookers are not limited to rice; they excel at steaming vegetables and cooking various grains like quinoa or couscous. Many models come with a steam tray for added versatility. Refer to the user manual for specific instructions on cooking different foods.

Recommended Read: How to Use Glue Traps for Bed Bugs

How to Use Glue Traps for Bed Bugs

0

Introduction

In the ever-evolving landscape of pest control, the uninvited presence of how to use glue traps for bed bugs continues to be a persistent challenge for homeowners. These nocturnal nuisances, thriving on the blood of unsuspecting sleepers, demand innovative solutions for detection and control. Enter the unassuming yet formidable glue trap—an unsung hero in the battle against bed bugs. This comprehensive guide aims to unravel the intricacies of how to use glue traps for bed bugs, offering insights into their application, benefits, and strategic placement.

How to use glue traps for bed bugs, with their uncanny ability to hide in cracks and crevices, pose a unique threat that demands a proactive approach. Glue traps, designed to ensnare these elusive pests, have emerged as a discreet yet powerful tool in the homeowner’s arsenal. As we embark on this journey, we’ll delve into the science behind glue traps, explore the market for the most effective options, and provide a step-by-step guide on their application.

Beyond being a mere remedy, glue traps embody a preventive strategy that empowers individuals to take charge of their living spaces. By the end of this guide, readers will not only be well-versed in the art of bed bug trapping but also equipped with the knowledge to safeguard their homes proactively. Embrace the power of prevention and bid farewell to bed bug woes as we navigate the fascinating world of glue traps.

Understanding the Enemy: Bed Bugs 101

Before delving into the intricacies of glue traps, it’s crucial to understand the adversary. This section sheds light on the biology and behavior of bed bugs, offering a foundation for devising an effective trapping strategy.

The Power of Glue Traps

In the ongoing battle against household pests, the unassuming yet powerful tool known as the How to use glue traps for bed bugs has emerged as a reliable ally, especially when it comes to combating the resilient and elusive bed bugs. Let’s delve into the intricacies of these adhesive wonders and explore the multifaceted power they bring to the realm of pest control.

Understanding the Science Behind Glue Traps

At the heart of a glue trap’s effectiveness lies a simple yet ingenious concept – adhesive surfaces that entangle and immobilize pests upon contact. This mechanism is particularly potent against bed bugs, whose movement patterns make them susceptible to the sticky embrace of these traps.

Choosing the Right Glue Trap for How to use glue traps for bed bugs

Not all glue traps are created equal. Explore the market’s offerings and discover the key features to consider when selecting the perfect glue trap for your bed bug battle.

Placement Strategies

Effective bed bug trapping hinges on strategic placement. This section provides a room-by-room guide, highlighting hotspots and common hiding spots where deploying glue traps can yield optimal results.

Step-by-Step Application

  1. Identify Infested Areas: Begin by identifying areas with signs of bed bug activity. Common indicators include reddish-brown stains on bedding, tiny exoskeletons, and a sweet musty odor. Focus on locations near sleeping areas, as bed bugs are nocturnal and prefer to feed during the night.
  2. Select Appropriate Glue Traps: Choose glue traps designed specifically for bed bugs. These traps typically have a durable adhesive surface and are strategically sized to capture these pests effectively. Consider factors like trap design, size, and any additional attractants incorporated into the trap.
  3. Strategic Placement: Carefully place the traps in key locations. Focus on areas where bed bugs are likely to travel, such as along baseboards, under furniture, near the headboard, and beneath the mattress. Ensure the traps are not obstructed by furniture or bedding, allowing for optimal bed bug interception.
  4. Optimal Trap Density: To maximize effectiveness, use an adequate number of traps. The density will depend on the severity of the infestation and the size of the area being treated. As a general guideline, consider placing traps every 5-10 feet in infested zones, creating a comprehensive monitoring network.
  5. Monitor Regularly: Implement a routine monitoring schedule. Regularly inspect the traps for captured bed bugs. This step is crucial for early detection and allows you to gauge the effectiveness of the traps. If traps become crowded with pests, replace them promptly.
  6. Document and Analyze: Keep a log of trap placements, noting the date and location of each trap. Document the number of bed bugs captured on each trap during inspections. This documentation aids in tracking trends, assessing the progress of control measures, and making informed adjustments.
  7. Combine with Other Strategies: While glue traps are effective, consider integrating them into a broader bed bug management strategy. Combine their use with other methods such as thorough cleaning, vacuuming, and, if necessary, professional pest control services for a comprehensive approach.
  8. Educate Residents: If used in multi-unit dwellings, educate residents about the purpose and benefits of glue traps. Encourage cooperation to enhance the overall effectiveness of the bed bug control efforts.
  9. Dispose of Traps Properly: When traps have served their purpose or become full, dispose of them properly. Seal them in a plastic bag before discarding to prevent any trapped bed bugs from escaping.
  10. Repeat as Needed: Bed bug control is an ongoing process. Repeat the application of glue traps as needed, especially after disruptions or changes in the environment that may trigger bed bug movement.

By following these step-by-step instructions, individuals can effectively apply glue traps for bed bugs, creating an integrated and proactive approach to managing and preventing infestations.

Dos and Don’ts

Avoid common pitfalls and enhance the efficacy of your bed bug trapping efforts with a comprehensive list of dos and don’ts. Learn from the experiences of seasoned bug battlers to optimize your strategy.

Beyond Trapping: Preventive Measures

Glue traps are a potent weapon, but a holistic approach is key to long-term success. Discover additional preventive measures and lifestyle changes that fortify your defenses against bed bugs.

The Human Touch: Bed Bug Stories

Connect with the experiences of real people who have successfully used glue traps in their fight against bed bugs. Gain insights, tips, and inspiration from those who have walked the path before.

Conclusion

In conclusion, the use of glue traps for bed bugs proves to be a discreet yet potent strategy in the ongoing battle against these resilient pests. Throughout this guide, we’ve uncovered the science behind these traps, explored their varied applications, and highlighted the importance of strategic placement. As homeowners grapple with the challenge of bed bug infestations, glue traps emerge as a reliable ally, offering not only a solution but also a proactive means of detection and prevention.

The versatility of glue traps lies not only in their effectiveness but also in their non-invasive nature. Unlike chemical treatments or invasive interventions, these traps provide a user-friendly, eco-conscious approach to pest control. By understanding the biology and behavior of bed bugs, individuals can strategically deploy these traps to disrupt the pests’ life cycle and minimize the risk of infestations.

As we wrap up this comprehensive guide, it’s evident that knowledge is the key to effective bed bug management. Armed with insights into the world of glue traps, readers are empowered to protect their homes and ensure restful nights, free from the nocturnal disturbances of bed bugs. Remember, prevention is the first line of defense, and with glue traps, individuals can proactively safeguard their living spaces against these unwanted intruders. Embrace the power of prevention, bid farewell to bed bug worries, and reclaim the tranquility of your home.

FAQs

Q: How often should I check and replace How to use glue traps for bed bugs?

A: Regular checks are recommended every 2-4 weeks, with replacement based on the manufacturer’s guidelines or when traps are full.

Q:Can How to use glue traps for bed bugs be used as a standalone solution for bed bugs?

A: While effective, glue traps work best as part of a comprehensive bed bug control strategy that includes cleaning, vacuuming, and potential professional intervention.

Q: Are How to use glue traps for bed bugs safe for pets and children?

A: Most glue traps are designed to be safe, but it’s crucial to follow usage instructions. Place traps in areas inaccessible to pets and children.

Q: Do glue traps attract bed bugs, or are they just for detection?

A: Glue traps primarily serve as detection tools. However, some traps may use attractants to enhance effectiveness.

Q: Can I make my own How to use glue traps for bed bugs?

A: While DIY traps are an option, commercially available traps are specifically designed and tested for optimal performance.

Recommended Read: How to Use a Plunger

How to Use a Plunger

0

Introduction

In the realm of household problem-solving, few challenges rival the frustration of a stubborn drain clog. When faced with the inconvenience of slow drains or standing water, the trusty plunger emerges as the unsung hero, ready to restore order to your plumbing. This comprehensive guide unfolds the intricacies of “How to Use a Plunger,” transforming a seemingly mundane tool into a powerhouse of DIY plumbing prowess.

Embark on a journey that demystifies the art of plunging, exploring the diverse types of plungers and unveiling the techniques that set apart a novice from a seasoned plumbing enthusiast. The reader-friendly narrative takes you beyond the basics, delving into advanced strategies and preventive measures that elevate your plunging game.

As we traverse the world of plungers, we delve into the importance of safety, common pitfalls to avoid, and the significance of regular maintenance to keep your drains flowing smoothly. This guide doesn’t just address clogs; it empowers homeowners to take charge of their plumbing destiny, offering practical insights for a clog-free future.

So, whether you’re a first-time plunger user or a seasoned DIYer seeking to refine your skills, this article equips you with the knowledge to conquer drain clogs with finesse. Say goodbye to plumbing woes and hello to a household where the plunger reigns supreme.

Understanding the Basics

Before How to use a plunger into action, it’s essential to understand the basics. We’ll explore the types of plungers, how they work, and when it’s appropriate to unleash their unclogging power.

Know Your Enemy: Clog Classification 101

Before wielding your trusty plunger, understand the foe you face. Clogs come in all shapes and sizes, each demanding a slightly different approach:

  • The Toilet Terror: The classic clog, often caused by a combination of human waste and papery foes.
  • The Sink Snarl: Usually hair, grease, or food scraps conspiring to impede your dishwashing dreams.
  • The Shower Sluggard: Hair, soap scum, and the occasional wayward toy forming a slimy barricade.
  • The Bathtub Bully: Similar to the toilet terror, but with more bubbles and potential bath toy casualties.

The Tools of the Trade: Choosing the Right Plunger

How to use a plunger, Not all plungers are created equal! Equip yourself for victory with the right weapon:

  • The Flange Plunger: The king of toilet unclogging, with a flange extending into the drain for maximum suction.
  • The Cup Plunger: A versatile warrior, effective on sinks, bathtubs, and even some toilet clogs.
  • The Accordion Plunger: A flexible warrior, ideal for reaching deep-seated clogs in sinks and bathtubs.

The Art of the Plunge: A Step-by-Step Guide

Now, to the battlefield! Here’s how to vanquish your clog with finesse & How to use a plunger.

Prep the Battlefield:

  • Remove any standing water to expose the clog.
  • For toilets, fill the bowl with enough water to cover the rubber cup of the plunger.

Engage the Enemy:

  • Place the plunger over the drainhole, ensuring a good seal.
  • For flange plungers, press the flange firmly into the drain.

Unleash the Suction:

  • Push down firmly and steadily on the plunger handle.
  • Don’t be afraid to use some muscle, but also avoid brute force that could damage pipes.
  • Repeat the push-pull motion for 10-15 seconds.

Assess the Situation:

  • If the water starts draining, victory is near! Repeat the plunging until the clog is fully banished.
  • If the water remains stagnant, consider a different approach like boiling water (for grease clogs) or baking soda and vinegar (for mild clogs).

Celebrate and Clean Up:

  • Flush the toilet or drain the sink to ensure the clog is truly gone.
  • Disinfect the plunger with bleach or a strong cleaner.
  • Give yourself a well-deserved pat on the back, you plumbing champion!

Beyond the Basics: Advanced How to use a plunger Plunging Techniques

For stubborn clogs, a few additional tactics can tip the scales in your favor:

  • The Boiling Water Blitz: For grease clogs in sinks, pour boiling water down the drain followed by plunging. Repeat if necessary.
  • The Bicarbonate Bomb: For mild toilet clogs, mix baking soda and vinegar in the bowl to create a fizzy eruption that might loosen the blockage. Follow with plunging.
  • The Plunger Tag Team: For extra-stubborn clogs, try combining the flange and cup plungers. Use the cup plunger to push water down the drain while simultaneously plunging with the flange plunger.

Remember, Safety First while How to use a plunger:

How to use a plunger, While plunging is generally safe, here are some precautions:

  • Wear gloves and eye protection when dealing with potentially messy clogs.
  • Avoid using harsh chemicals like drain cleaners, as they can damage pipes and harm your lungs.
  • If the clog persists after your best efforts, call a professional plumber. Don’t try to be a hero against an enemy beyond your expertise.

The Plunger’s Legacy: A Symbol of Triumph

Mastering the art of the plunger is a valuable skill, empowering you to conquer clogs with confidence and keep your plumbing flowing freely. So, the next time a drain throws a tantrum, remember this blog, remember your trusty plunger, and channel your inner plumbing master. With a little knowledge and a lot of (controlled) muscle, you’ll be vanquishing clogs and basking in the glory of a clear drain in no time!

Step-by-Step Plunging Technique

The heart of our guide lies in the step-by-step plunging technique. Learn how to secure a good seal, apply controlled pressure, and master the art of repetition for optimal results.

Dealing with Stubborn Clogs

For those persistent clogs, we’ve got additional strategies up our sleeves. Discover how to enhance your plunging power with hot water, baking soda, and vinegar, and know when it’s time to call in the professionals.

Maintenance Tips to Prevent Future Clogs

But why wait for a clog to strike? We’ll share proactive maintenance tips to keep your drains flowing freely, preventing future clogging catastrophes.

Common Mistakes to Avoid

While wielding a plunger, it’s crucial to avoid common mistakes that might hinder your efforts. Learn about the right plunger type, and never compromise on safety measures.

Conclusion

In conclusion, mastering the art of using a plunger is not just about unclogging drains; it’s about empowering homeowners with a simple yet effective DIY plumbing solution. By understanding the types of plungers, perfecting the plunging technique, and knowing when to employ additional strategies, you’ve equipped yourself to face drain clogs with confidence.

Our guide emphasizes proactive measures, promoting regular maintenance to prevent future clogs and reduce the likelihood of plumbing emergencies. Remembering the importance of safety measures and avoiding common mistakes ensures that your plunging efforts are not in vain.

As you navigate the world of plumbing problem-solving, it’s crucial to adapt your approach based on the type of drain and the severity of the clog. The FAQs address common queries, providing additional clarity for a well-rounded understanding.

Armed with this knowledge, you’re not just a homeowner; you’re a plumbing enthusiast ready to face any clog head-on. The journey from understanding the basics to implementing advanced techniques culminates in the ability to maintain a free-flowing plumbing system, making you the hero of your household’s plumbing saga.

Get ready to bid farewell to clogs and welcome a home where drains run smoothly. Dive into the world of plungers, explore different techniques, and take charge of your plumbing destiny. Your clog-free future awaits!

FAQs

Q: How to use a plunger on any type of drain?

A: While plungers are versatile, there are specific plungers for toilets and sinks. It’s essential to use the right tool for the job.

Q: What do I do if the plunger doesn’t work?

A: If plunging doesn’t solve the issue, consider using alternative methods like a drain snake or seeking professional help.

Q: Is there a specific plunging technique for How to use a plunger in toilets?

A: Yes, toilets require a slightly different technique. Ensure a good seal, and plunge with a vertical motion for best results.

Q: Can I use a plunger on a double sink?

A: Yes, you can use a plunger on a double sink. However, ensure that one side is sealed while plunging the other.

Q: Are there eco-friendly alternatives to chemical drain cleaners?

A: Absolutely! Baking soda and vinegar can work wonders as an eco-friendly alternative to chemical drain cleaners.

Recommended Read: Baldur’s Gate 3 How to Remove Party Members

Baldur’s Gate 3 How to Remove Party Members

0

Ah, Baldur’s Gate 3 How to Remove Party Members. A world of sprawling adventure, perilous encounters, and a party that might be getting just a little out of hand. Don’t get me wrong, a diverse group of companions adds layers of charm and strategic depth to your journey through Faerun. But sometimes, you need to streamline your squad, make way for a new face, or just give Shadowheart one more chance to not blow up your diplomatic negotiations. So, how do you prune your party without resorting to questionable tactics like shoving them into traps? Fear not, intrepid adventurer, for this guide will walk you through the ins and outs of dismissing companions in Baldur’s Gate 3 How to Remove Party Members.

The Party Panel serves as your command center for party management. To access it, press ‘P’ on your keyboard. This opens up a visual display of all the characters currently in your party.

Selecting the Unwanted Member

Once in the Party Panel, identify the character you wish to part ways with. Click on their portrait or character model to highlight them. This action signals your intent to make changes to your party.

Initiating the Dismissal

Look for an option within the Party Panel that facilitates the removal of the selected character. Phrases like “Dismiss” or “Remove” are commonly used. Click on this option to initiate the dismissal process.

Confirming Your Decision

Games often include a confirmation step to prevent accidental removals. Confirm that you indeed want to dismiss the selected character from your party. This ensures that your choices are deliberate.

Consider the Character’s Placement

Upon dismissal, the character may still exist in the game world. Ensure they are in a safe location, away from immediate threats or ongoing combat. Dismissing a character mid-fight might have consequences.

Fine-Tuning Your Party Composition

With the unwanted character removed, take the opportunity to assess your party’s needs. If required, you can recruit new characters to enhance your group dynamics.

In-Game Variations

Keep in mind that game mechanics can evolve with updates and patches. Always check the in-game tutorial or manual for any specific nuances related to your version of Baldur’s Gate 3 How to Remove Party Members.

Before We Begin: A Tale of Two Parties

There are two distinct types of party members in Baldur’s Gate 3 How to Remove Party Members:

  • Origin Companions: These are the pre-built characters you meet throughout the game, like Lae’zel the Githyanki warrior or Astarion the charming vampire spawn. Removing them is generally straightforward, with specific dialogue options triggering their departure.
  • Custom Characters: These are your creations, be they solo adventurers or co-op companions brought in by friends. Things get a bit trickier here, depending on the situation.

Parting Ways with Origin Companions:

  1. Talk it Out: Most origin companions have specific dialogue options that allow you to dismiss them. These are usually context-sensitive, appearing during disagreements, after completing their personal quests, or when reaching certain points in the story. Keep an eye out for dialogue choices like “We should go our separate ways” or “Perhaps it’s time for you to pursue your own path.”
  2. Camp Companionship: If you’re unsure where to find the option, or haven’t reached a pivotal moment in their story, head to camp. Each companion has a designated spot where they spend downtime. Approaching them here often unlocks additional dialogue options, including dismissal.
  3. The Power of Rest: Sometimes, a simple long rest with the companion in your party can trigger new dialogue options, especially after completing major story beats. Give it a shot, who knows what the campfire whispers might reveal.

Custom Character Conundrums:

  1. Co-op Companions: For characters created by friends, the process is simpler with Patch 2. You can now talk to them directly and politely request their temporary leave. Remember, they’ll rejoin automatically when your friend comes back online.
  2. Custom Soloist: Removing your own custom character is unfortunately trickier. As of now, there’s no direct dismissal option. However, there are a couple of workarounds, albeit not ideal:
    • Reload to Pre-Party Formation: If you haven’t progressed too far, consider reloading to a save point before you added your custom character to the party.
    • Creative Kills (Not Recommended): This is more of a “break glass in case of emergency” option. Killing your own character will technically remove them from the party, but be warned! You’ll lose all their gear and potentially miss out on future interactions with their corpse (yes, it gets weird).

Beyond the Dismissal: Where Do They Go?

Dismissed companions won’t be left stranded in the wilderness. They’ll usually head back to camp and wait for your return. You can always re-add them to your party later by finding them there and engaging in friendly conversation. They might even have some interesting stories to tell!

Conclusion: Pruning with Purpose

Dismissing companions might feel like a betrayal, but remember, it’s not forever. It’s an opportunity to explore different party dynamics, experiment with builds, or simply give everyone some breathing room. So, go forth, adventurers, prune your party with purpose, and enjoy the ever-evolving tapestry of Baldur’s Gate 3 How to Remove Party Members relationships!

Bonus Tips:

  • Consider your party composition and the upcoming challenges. Do you need more firepower, magical support, or just someone to crack jokes and lighten the mood?
  • Think about companion interactions and potential conflicts. Sometimes, letting go of a clashing personality can make for a smoother journey.
  • Don’t forget the roleplay! Dismissing a companion shouldn’t feel like just clicking a button. Make it a story beat, a chance for emotional growth, or even a hilarious misunderstanding.
  • Remember, Baldur’s Gate 3 How to Remove Party Members is all about choices and consequences. Embrace the flexibility of your party, and don’t be afraid to experiment!

And with that, I bid you farewell! May your adventures be grand, your parties well-balanced, and your decisions bold. Now go forth and prune, heroes!

Recommended Read: How to Hide the Emperor’s Child