
Table of Contents
Introduction
Embarking on a DIY project can be a thrilling endeavor, but when confronted with the stubborn challenge of a broken bolt, frustration often takes center stage. Whether you’re a seasoned DIY enthusiast or a novice, the ordeal of dealing with a fractured bolt is a universal woe. In this guide, we will unravel the mysteries of how to remove a broken bolt, providing you with a comprehensive roadmap to tackle this common issue.
Bolts break for various reasons, from rust and corrosion to overtightening or age-related fatigue. The significance of promptly addressing a broken bolt cannot be overstated, as neglecting this seemingly minor issue can lead to larger problems down the line. This guide is crafted for those seeking a DIY solution, offering step-by-step insights into the entire process.
Throughout this journey, we will delve into the intricacies of understanding bolt breakage, selecting the right tools, and employing various techniques to effortlessly remove the broken bolt. By the end of this guide, you’ll be equipped with the knowledge and confidence to face this challenge head-on, transforming a potential setback into a triumph of DIY prowess. So, roll up your sleeves, gather your tools, and let’s navigate the world of broken bolts together.
Understanding the Bolt Breakage
When faced with the challenge of a how to remove a broken bolt, the first step toward resolution lies in unraveling the mystery behind why bolts break in the first place. Bolts can succumb to various stressors, and comprehending these factors is pivotal for effective removal.
- Material Fatigue: Bolts, especially those subjected to constant stress or load-bearing conditions, can succumb to material fatigue over time. This is often a result of cyclic loading and unloading, causing the metal to weaken and eventually lead to a break.
- Corrosion and Rust: Exposure to the elements, particularly in outdoor or humid environments, can trigger corrosion on bolt surfaces. The formation of rust not only weakens the structural integrity of the bolt but also increases friction during removal.
- Over-tightening: Applying excessive force during the tightening process can result in over-tightening, causing the bolt to reach a stress point beyond its capacity. This stress concentration may eventually manifest as a break, especially in bolts with lower tensile strength.
- Poor-Quality Bolts: The quality of the bolt itself plays a crucial role. Substandard materials or manufacturing processes can make bolts more susceptible to breakage, especially when exposed to challenging conditions.
- Environmental Conditions: Extreme temperatures, vibrations, or sudden impacts can contribute to bolt breakage. Bolts in machinery or automotive components, for instance, may experience these conditions regularly, increasing the risk of failure.
Understanding these contributing factors is the cornerstone of effective bolt removal. It allows DIY enthusiasts and mechanics alike to tailor their approach based on the specific circumstances, ultimately increasing the likelihood of a successful resolution. Armed with this knowledge, individuals can navigate the complexities of bolt breakage with confidence and precision.
Tools and Safety Gear
Ensuring a successful broken bolt removal process goes beyond knowing the techniques; it’s about having the right tools and prioritizing safety. The combination of proper equipment and safety measures not only enhances efficiency but also safeguards against potential hazards.
- Wrenches and Pliers:
- Adjustable Wrenches: Ideal for gripping and turning the bolt, adjustable wrenches come in various sizes to accommodate different bolts.
- Locking Pliers (Vice Grips): These provide a secure grip on the bolt, preventing slippage during removal.
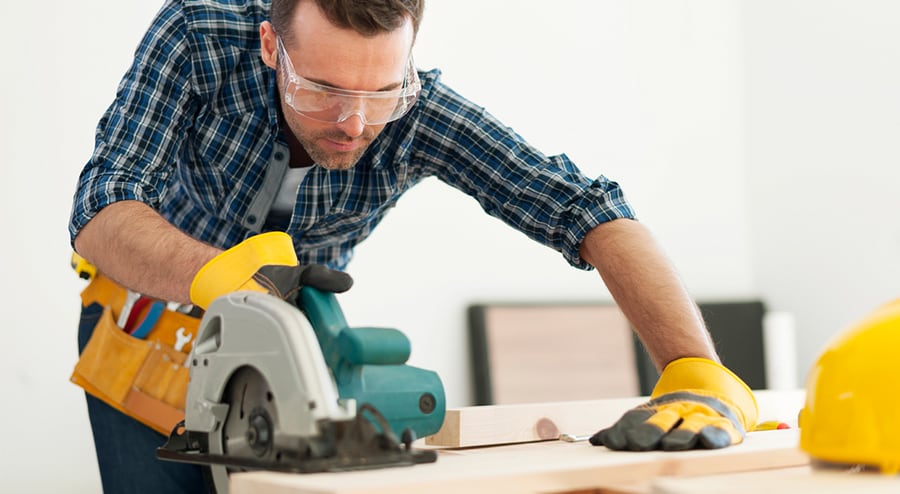
- Safety Glasses and Gloves:
- Safety Glasses: Protect your eyes from debris, especially when using tools like drills or hammers.
- Gloves: Wear sturdy gloves to shield your hands from sharp edges, hot surfaces, or chemicals.

- Penetrating Oil:
- WD-40 or PB Blaster: Applying penetrating oil helps lubricate the bolt, easing its removal by reducing friction. Let it sit for some time to maximize effectiveness.
- Heat Source:
- Propane Torch or Heat Gun: Heat can expand metal, aiding in the loosening of a stubborn bolt. Exercise caution and follow safety guidelines when applying heat.
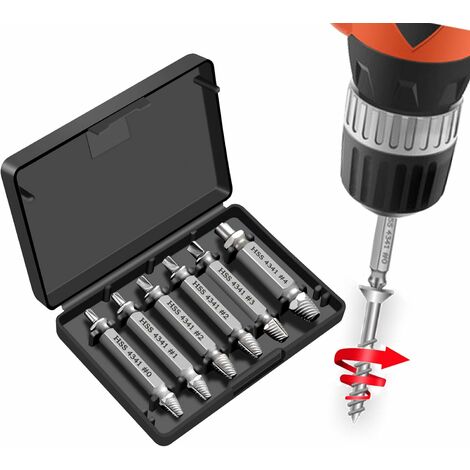
- Bolt Extractors:
- Screw Extractor Set: These specialized tools are designed to grip into the bolt and facilitate its removal. Available in various sizes, they offer versatility.
- Drill and Drill Bits:
- Corded or Cordless Drill: Used for drilling into the broken bolt when other methods fail.
- Left-Hand Drill Bits: These can extract the bolt while drilling, utilizing the bolt’s own rotation.
- Tapping Tools:
- Tap and Die Set: When creating new threads is necessary, tapping tools are invaluable for the extraction process.
- Chemical Solvents:
- Rust Dissolvers: Products like Rust-Oleum or Liquid Wrench can dissolve rust, making it easier to remove the bolt.
- Thread Lubricant:
- Anti-Seize Compound: Applying this to bolts during reinstallation can prevent future corrosion and make removal easier.
- Safety Precautions:
- Eye Protection: Always wear safety glasses to shield your eyes from debris.
- Gloves: Sturdy gloves protect your hands from cuts, scrapes, and exposure to chemicals.
- Work Area Ventilation: When using chemicals or a torch, ensure proper ventilation to avoid inhaling fumes.
- Fire Safety: Keep a fire extinguisher nearby when using heat sources.
Equipping yourself with these tools and safety measures sets the foundation for a successful broken bolt removal endeavor. Always prioritize safety and choose the tools that best match the specifics of your situation.
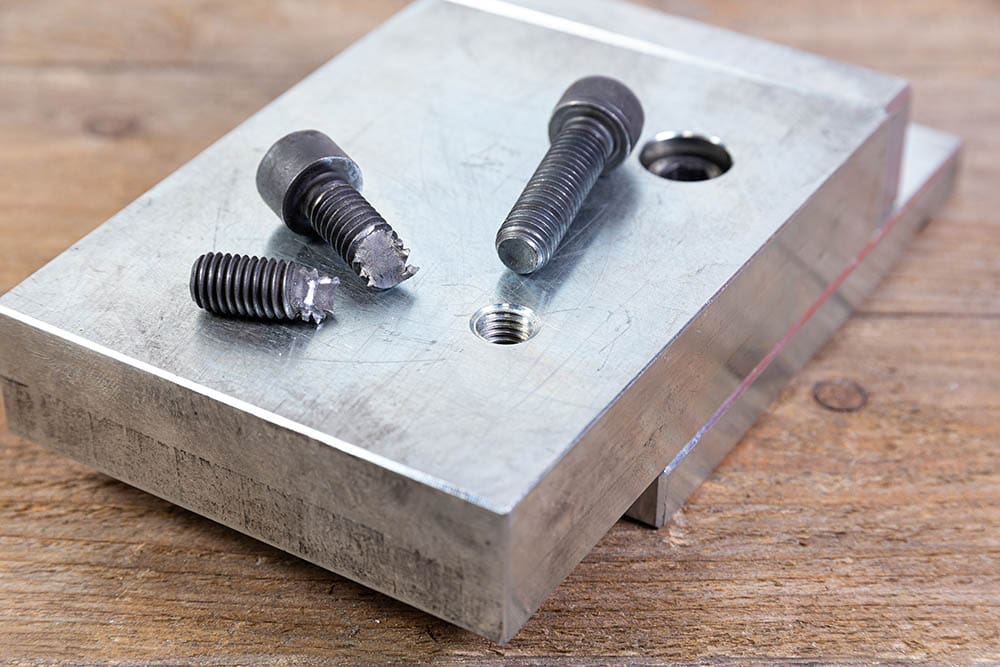
Assessment of the Situation
Carefully inspect the broken bolt, considering its size and type. Knowing what you’re dealing with is essential for choosing the right removal method.
Preparation Steps
Lubrication is key to easing the bolt removal process. Learn the art of proper lubrication and the use of penetrating oil for smoother removal.
Different Removal Methods
From traditional tools like pliers to specialized bolt extraction tools, explore various methods to find what suits your situation best.
Heat Application Techniques
Unlock the power of heat in loosening a stubborn bolt. Understand the thermal expansion principle and apply heat safely to expedite the removal process.
Use of Chemicals
Chemical solvents can work wonders on rusted bolts. Discover the right products and precautions for effective chemical application.
Drilling as a Last Resort
When all else fails, drilling becomes a viable option. Follow a step-by-step guide on drilling into the broken bolt and choosing the right drill bit.
Tapping and Extracting
Learn the art of tapping and extracting, a technique that involves creating new threads and extracting the broken bolt with relative ease.
Preventive Measures
Prevention is the best cure. Acquire tips on avoiding future bolt breakage through regular maintenance practices.
Common Mistakes to Avoid
Educate yourself on common mistakes that might exacerbate the situation, and benefit from the experiences of others who have faced similar challenges.
When to Seek Professional Help
Recognize the signs indicating when it’s time to admit defeat and seek professional assistance. Choose a reliable mechanic or technician for complex bolt removal scenarios.
Conclusion
In conclusion, the journey of removing a broken bolt is not merely a mechanical task; it’s a testament to the resilience and resourcefulness of the DIY spirit. As we wrap up this guide, it’s essential to recap the key takeaways that will empower you in your future encounters with stubborn bolts.
Mastering the art of how to remove a broken bolt involves a holistic approach, from understanding the intricacies of bolt breakage to employing the right tools and techniques. The importance of meticulous preparation, safety precautions, and patience cannot be overstated. Remember, each broken bolt tells a unique story, and your ability to decipher it will determine your success.
By incorporating the preventive measures discussed and learning from common mistakes, you’ll not only overcome the immediate challenge but also fortify your skills for future endeavors. DIY enthusiasts, whether seasoned or novice, should embrace each broken bolt as an opportunity to hone their craft.
So, as you venture into the realm of DIY repairs, armed with the knowledge gained from this guide, take pride in the fact that you’ve not only conquered a broken bolt but also added another feather to your DIY cap. Happy fixing!
FAQs
- Q: Can I use regular pliers to remove a broken bolt?
- A: While regular pliers can help, specialized tools are more effective.
- Q: Is it safe to apply heat to a broken bolt?
- A: Yes, but precautions must be taken to avoid damage or injuries.
- Q: How can I prevent bolts from breaking in the first place?
- A: Regular maintenance, lubrication, and proper tools can help prevent breakage.
- Q: Can I reuse a bolt that has been removed?
- A: It depends on the condition of the bolt; thorough inspection is recommended.
- Q: When should I admit defeat and seek professional help?
- A: If all DIY attempts fail or if the situation worsens, professional assistance is advisable.
Recommended Read: How To Clean Nike Shoes?